How to Transfer Sites to Cloudways? Step-by-Step Guide
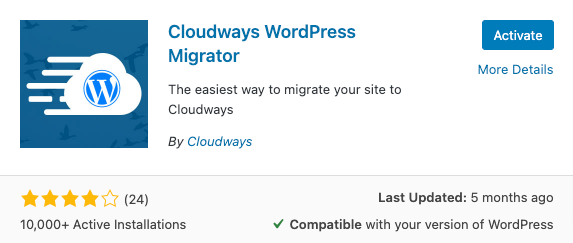
Cloudways offers a free WordPress Migrator Plugin called the Cloudways WordPress Migrator plugin.
Using this plugin, you can migrate your WordPress, as well as, WooCommerce applications, to Cloudways.
This post explains how you can use the Cloudways WordPress Migrator plugin to transfer sites to Cloudways in a few simple steps.
How to use the Cloudways WordPress Migrator plugin?
Launch WordPress Application on Cloudways
Before you can use the Cloudways WordPress Migrator plugin, it’s essential to first launch a WordPress Application on the Cloudways platform.
This application will be the Destination to which you will migrate your WordPress site. You will have to head over to the Servers tab to launch a new WordPress application on a new server on Cloudways.

Next, you will have to add the desired server. After that, you can add your WordPress application and name it “Destination” for convenience’s sake.
Install the WordPress Migrator Plugin on your existing WordPress website
After launching a destination WordPress application, the next best thing is to get back to your current WordPress site and install the WordPress Migrator Plugin.
Installing the WordPress Migrator Plugin is as simple as installing any other plugin in WordPress.
In case you are not already familiar with it, here are the steps you need to follow:
- Log in to your WordPress dashboard and head over to the Plugins section
- Next, click on Add New, and search for Cloudways WordPress Migrator
- After you find it, click on Install Now and then click Activate
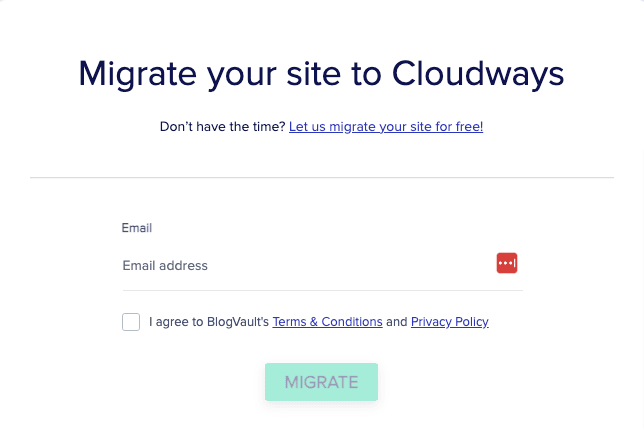
Initiate the WordPress Migration Process
Once you install the Cloudways WordPress Migrator, you are good to start the migration process. Here are the essential steps to follow:
- To start, you will need to enter your email address
- Next, you will have to agree to the terms & conditions and privacy policy
- After that, you can click on the Migrate button
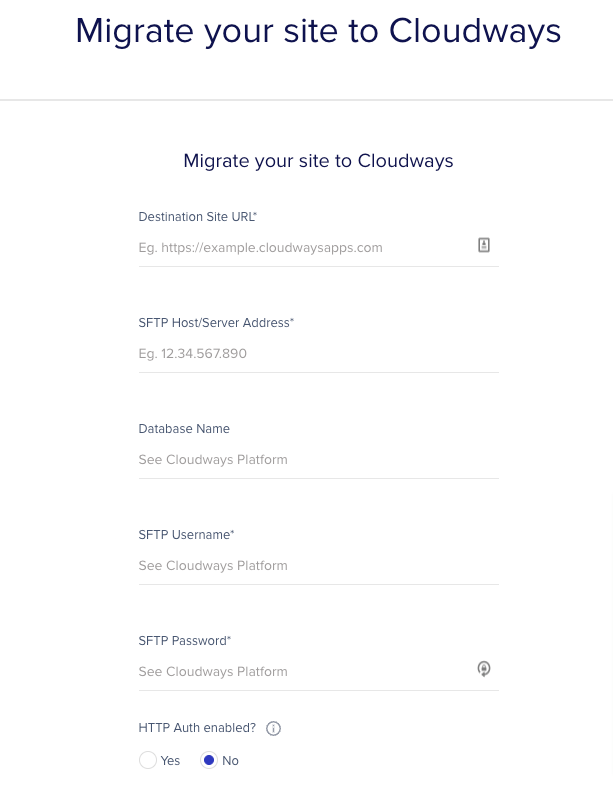
- Next, you will need to enter the destination site URL (the URL of the destination site that you launched on Cloudways)
- Then, you will need to enter your SFTP Host/Server Address and the Database Name.
- You will find all the necessary information by getting to the destination application under the Servers tab in your Cloudways account.
- Next, you will have to enter your SFTP Username, which is your Master username.
- After that, you will need to enter your master user’s password
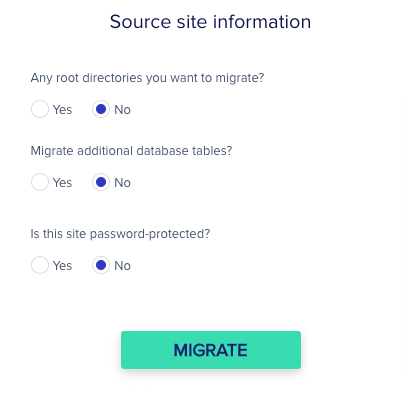
- A few more settings: select No Under “HTTP Auth enabled?” and select Yes Under “Any root directories you want to migrate?”
- Besides, you will have to select No Under “Is this site protected?” and this is pretty much it for the settings part.
- Now, click on the Migrate button.
That’s pretty much it to get your migration started. As far as the migration time goes, it depends upon the website’s size.
Where to find the various information required in the Migration process?
To initiate the migration process, you will need to specify some critical pieces of information, such as the Destination URL, SFTP Host/Server Address (IP address), and Database Name. If you are wondering why to find them, you will find these access details when you click on your application’s name.
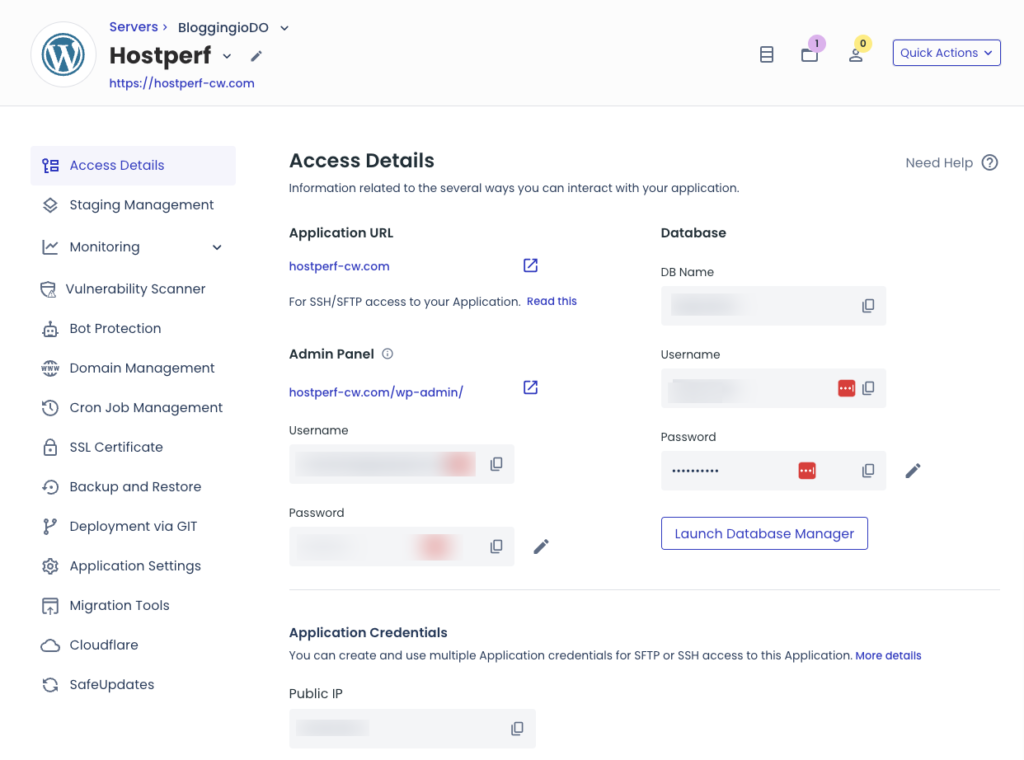
If you remember, we chose to keep the application name as Destination for our convenience. You need to log in to your Cloudways account and look for Servers from the top menu bar to get there.
After you find the Servers option, you must choose the desired server and click on www. Next, you must click on your application’s name, which will display all your access details. For the SFTP details, you need to click on Master Credentials.
About Cloudways
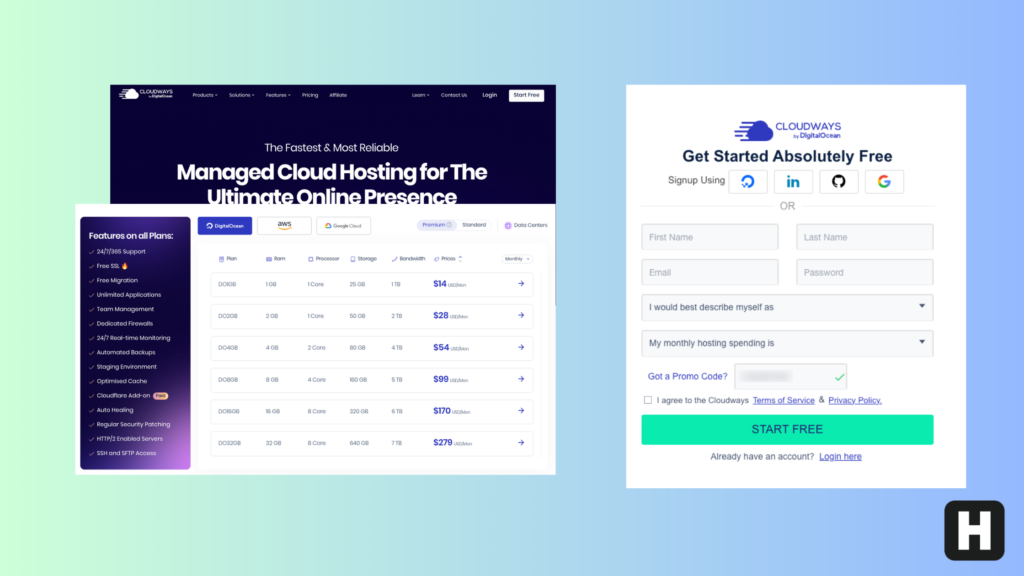
Cloudways is undoubtedly an excellent hosting service, and the service also has a seamless migration process. Most importantly, users can do it on their own for free using the Cloudways WordPress Migrator plugin. New users may find the idea a little intimidating since they fear things going wrong during the process.